Battlecraft 1942 Tutorials
• Painting Textures using the Pattern Stamp Tool •
|
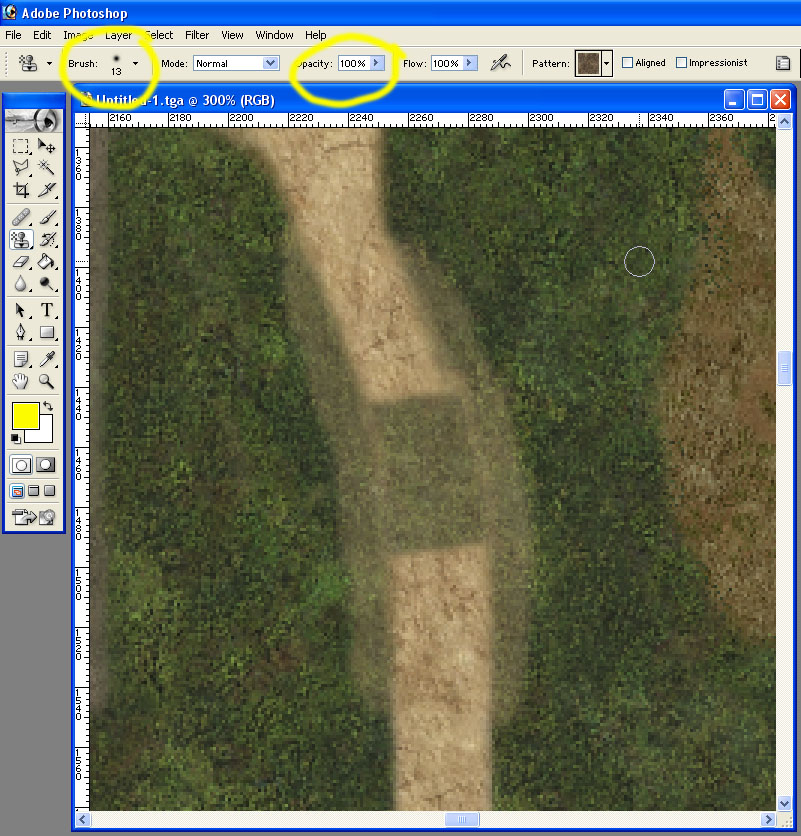
Open your Large image you prepared with the last tutorial, if you don't already have it open. Now you can start painting with textures using the Pattern Stamp Tool, as shown in the image below: I have chosen to zoom in 300% to get a nice clean view of the texture (keep in mind, these have been edited once and you wont see the nasty Battlecraft generated textures that you'll have). After selecting the Pattern Stamp Tool (Under the Clone Tool, if Clone Tool is selected), choose a pattern to paint with. If you prepared them using the first tutorial in this series, you'll find them in there. If you hold your mouse over them, it will tell you which one it is. In this first image, I selected the Wet_Grass texture.
Select a brush size and type that you want to paint with, and have some fun! Now, I will take paint some Wet_Grass over the center part of the sand road, and then choose the Dry_Sand pattern and reduce the opacity to give it a more natural blend to it. The image below shows the Opacity level changes and where you can find them. You can get really creative with the opacity changes too, real close to the road, or whatever you want to blend, draw a little at about 42%, then a little further out drop opacity to about 34%, and further out, 22%, etc. You can really naturalize the flow of your textures this way. It takes time, but hey, Rome wasn't built in a day.
When you're all done painting your textures and you are ready to replace those ugly Battlecraft generated textures, you want to flip your image back vertically again. IMPORTANT!!! Be Sure To Image > Rotate Canvas > Flip Canvas Vertical. Finally, Save your changes. Now its time to move onto the next tutorial (second from the last) in this series: Splitting the Large Image back into individual smaller images |