
PENDULUM TUTORIAL w/ pictures
(PLEASE WAIT FOR THEM
TO LOAD)
#4. Now we are going to create a square to put at the bottom of the pendulum to simulate the pendulum. When you compile and run this map, you will see this thing you are creating swinging in the middle of the room out of no where, attached to nothing at all. Select the following texture, FIFTIES_DR1. Using the BLOCK TOOL, create a square with the following dimensions: 2w 8l 9h. Place it at the bottom of the long stick you just made and center it in the XY View and XZ view with the stick. You should now be looking at something like the image below:
| 3D View |
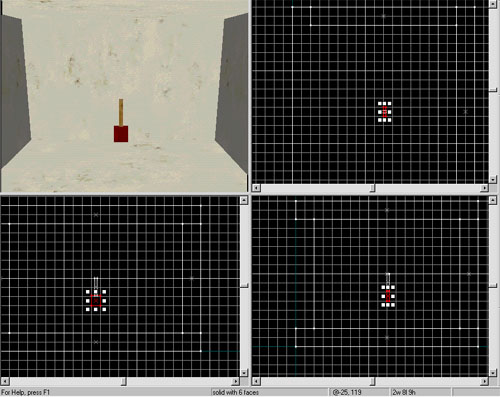 |
XY View |
| YZ View | XZ View |
#5. Now that we have our pendulum, lets make it pendulate (is that a word?, Pendulate?), anyway, You will need to use the origin texture before we can use the FUNC_PENDULUM entity. If you have never used the origin texture, don't worry. What is the Origin Texture? The origin texture is a texture that will not be visible during game play. What does it do? It allows for you to make things move on an invisible hinge or point that something swings on or from. Like a door swings on hinges. So select the ORIGIN brush, you can just click on your Texture BROWSE button and type origin. It is just like the CLIP texture, just with a green color to it. Now that you have your ORIGIN texture ready to go, create a small stick above the first stick you created in step number 3. Except make this stick 2w 2l 6h. Place it directly about the step three stick. You should now be looking at something like the picture below, please note that the 3D View is zoomed in so you can see what you should have.
| 3D View |
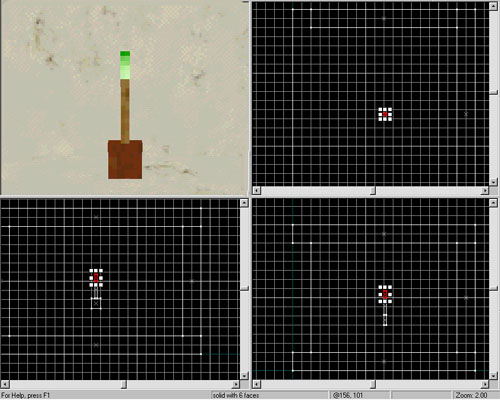 |
XY View |
| YZ View | XZ View |
#6. Now that we have everything we need to make this pendulum, lets make this baby swing! WooHoo, oh wait, sorry. Got a little carried away, we are almost finished. Alright, I am ok now. Holding down the CONTROL key, click with your left mouse button on the little stick that you used the origin brush on, click the middle stick from step three and the square from step 4. You can do the clicking on each of them in the 3D View. When you have them all selected, they will be all outlined in red and you can let go of the CONTROL key. Now we have to group them together and tie them to the FUNC_PENDULUM entity. So go to your tool bar and select TOOLS, GROUP or Control+G. This will group the three pieces together and is necessary if you want the sqaure to swing with the stick. Now select TOOLS, TIE TO ENTITY or Control+T and this will bring up the Object Properties dialog. Now select func_pendulum with the drop down box and here are the goodies we will need to make it swing back and forth. Leave the ANGLE alone, this will only complicate things. Now for the attributes:
NAME: (Don't name it unless you are going to target this and have it so that it has to be turned on or something like that)
RENDER FX: Normal
RENDER MODE: Normal
FX AMOUNT: 0
FX COLOR: 0 0 0
SPEED: 65 (This will determin how fast your pendulum will swing back and forth)
DISTANCE: -8 (Make sure you put the MINUS sign, this is a negative number)
DAMPING: 0
and all the rest of the attributes can be left as they are. Now you need to click on the FLAGS tab on the Object Properties dialog and make sure it looks like the image below:
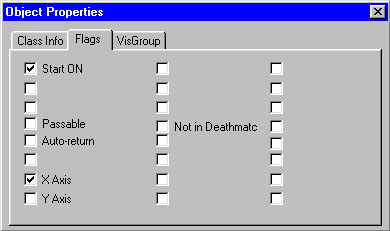
If your pendulum or swinging object
is swinging in the wrong direction,
just click the Y Axis box and unclick the X Axis box.
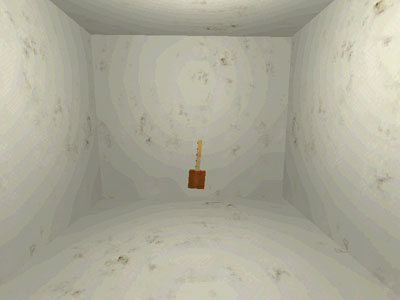
#7. Last step, the only thing you have left to do now is add a info_player_start in the room and a light source. I assume you know how to them already. If not, email me and I will have to put a tutorial up for that. After you have added the info_player_start and a light source, compile your map so you can check out your swinging pendulum. Here is what you should see, except yours will be swinging. (If you followed this tutorial).
All you need to do is build your swinging object to your needs. If you need something longer and larger, do it. Just make sure that you group the swinging or moving parts together. Then you have to be sure to put the ORIGIN brush at the point that you want the object to swing from. Think of a plant hanging from the ceiling. You can push push it and it will swing. It is most likely hanging from a hook on the ceiling. That hook is the point that the plant swings on. That should help you to understand the concept of placing your origin brush.
This tutorial was written by TFCmaster.net. All images and text were created for this tutorial. Please contact me if you would like to post this tutorial on your web site. tfcmaster@tfcmaster.net