Battlefield Mapping Tutorials
Painting Roads Using Custom Brushes
This tutorial was written for painting roads with the realistic appearance of tracks on your surface maps.
Tools used for this tutorial:
• Battlefield 1942 (obviously you need the game)
• Battlecraft 1942
• Adobe Photoshop 7.0 (older versions may differ slightly using certain tools,
and possibly features)
• Custom Brushes for Photoshop (download here)
only 1kb
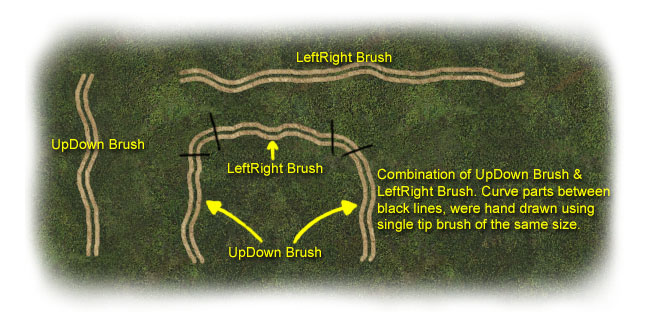
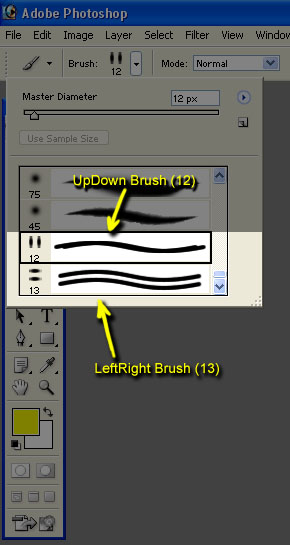
This image shows the UpDown Road Brush and the LeftRight Road Brush along
with the curve sections hand drawn using a regular single tip brush of equal
size.
The tracks are the exact width of the tracks used on Guadalcanal, which should
be sufficient for any map.
I used the pattern stamp with the custom dual tip brush I created and painted
with the Dry Sand texture atop the Wet Grass texture.
Here is a quick tutorial on how to add these brushes you download. I'll write
this up better on my site soon.
This tutorial is for adding the brushes for Photoshop 7, other Photoshops 4.0
and up may vary in the location the file has to be.
Unzip the file (BattlefieldBrushes.abr) into the following Adobe Photoshop 7
directory:
Adobe\Photoshop 7.0\Presets\Brushes\Adobe Photoshop Only (note: your
install path may vary slightly)
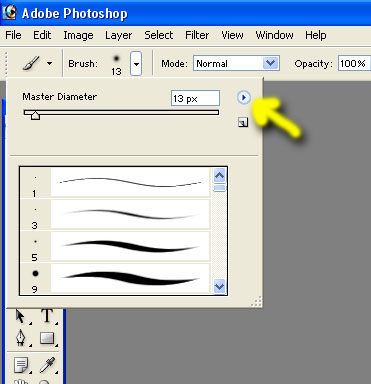
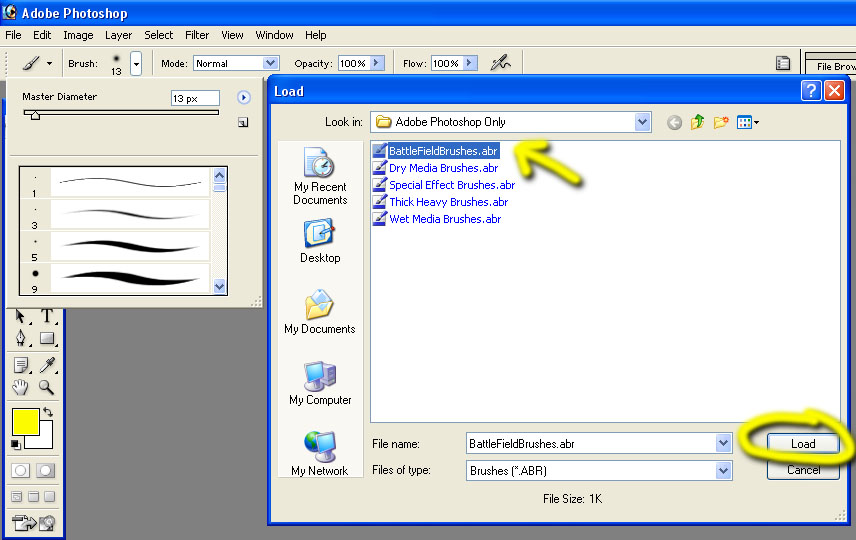
Now we're going to load the custom brushes, click on the Brushes button and then
the little arrow as shown below:
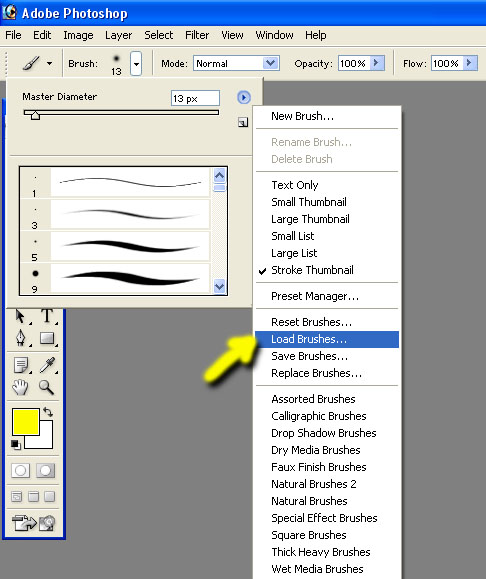
Then select Load Brushes, as shown in image below:
If you put it in the correct directory, it should show, so select it and load it
as shown below:
Now, scroll down all the way to the bottom and the custom Battlefield Road
Brushes will show as such:
Another tip to mention, Zoom in 300% while painting
the roads, while painting anything, it really helps.
Now have fun painting on your One Large Image that I hope you created from using
my other tutorials.